
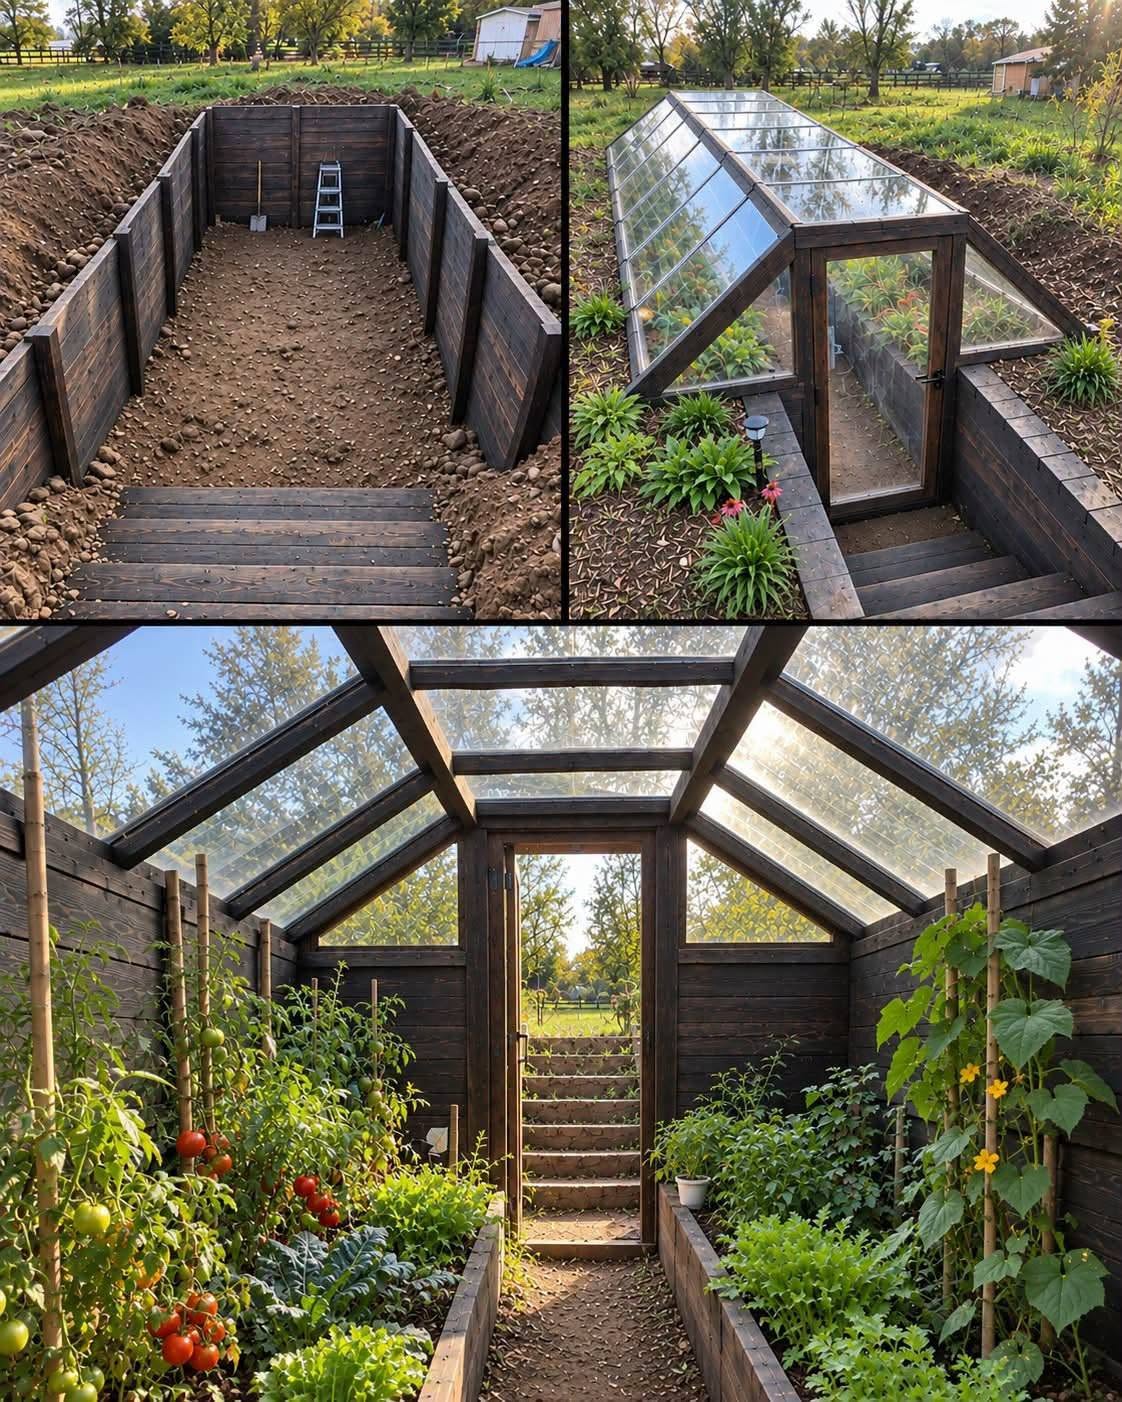
Materials You Will Need
Shovel or excavator
Gravel
Wooden beams or metal framing
Concrete blocks, earthbags, or treated wood for walls
Plastic greenhouse film or polycarbonate panels
Drainage pipe
Stones or thermal
mass (barrels filled with water work well)
Ventilation pipes or windows
Step‑by‑Step: How to Build a Walipini
Step 1: Dig the Pit
Excavate a rectangular pit approximately:
6–8 feet (1.8–2.5 m) deep
10–30 feet (3–9 m) long
8–12 feet (2.5–3.5 m) wide
Slope the north wall higher than the south wall to support the angled roof.
Step 2: Create Proper Drainage
Spread a layer of gravel at the bottom and install a perforated drainage pipe leading outside the structure. This prevents water accumulation and root rot.
Step 3: Build the Walls
Options include:
Concrete blocks
Stone
Earthbags
Treated wood (only if well protected from moisture)
The walls should be strong enough to resist soil pressure and insulated if possible.
Step 4: Add Thermal Mass
Place stones, bricks, or black barrels filled with water along the walls. These store solar heat and release it slowly at night.
Step 5: Install the Roof
Build a strong frame using wood or metal and cover it with:
Greenhouse plastic (cheapest)
Polycarbonate panels (more durable)
Seal all gaps to prevent heat
loss.
Step 6: Ventilation System
Install at least:
One low air intake
One high exhaust vent
This allows hot air to escape in summer and prevents mold and humidity problems.
Step 7: Create Growing Beds
Raised beds or in‑ground soil beds both work well. Improve soil with compost and organic matter.
Best Crops for a Walipini
Leafy greens (lettuce, spinach, kale)
Herbs (basil, parsley, cilantro)
Tomatoes
Peppers
Cucumbers
Green onions
Strawberries
Microgreens
Root crops also perform well in cooler conditions.
Common Mistakes to Avoid
Building in flood‑prone areas
Poor ventilation
Weak wall reinforcement
Incorrect roof angle
No drainage system
Using untreated wood underground
Maintenance Tips
Monitor humidity
Clean roof regularly for maximum light
Rotate crops
Check structural supports yearly
Add compost seasonally
Cost Considerations
A simple walipini can be built for very little if you use local materials and manual labor. More advanced versions with polycarbonate roofing and concrete walls cost more but last decades.
Compared to traditional heated greenhouses, long‑term savings are significant due to minimal energy usage.
Is a Walipini Worth It?
For anyone serious about food independence,
sustainability, and low‑cost year‑round gardening, the answer is yes. An underground greenhouse offers unmatched efficiency, durability, and growing potential using simple natural principles.
It is not just a structure—it is a long‑term investment in resilience, self‑sufficiency, and healthy food production.
Building a walipini requires planning and physical work, but the rewards last for decades. With stable temperatures, reduced energy needs, and reliable harvests, an underground greenhouse is one of the most powerful tools for modern sustainable gardening.
Whether you live in a cold climate or simply want better control over
your growing conditions, a walipini can transform how you produce food.
Disclaimer: Always check local building regulations and soil conditions before digging large underground structures. Proper engineering and drainage are essential for safety and long‑term durability.






Comments